Helpful tips to speed up a Linux sofware RAID rebuild
Tip #1: /proc/sys/dev/raid/{speed_limit_max,speed_limit_min} kernel variables
The /proc/sys/dev/raid/speed_limit_min is config file that reflects the current "goal" rebuild speed for times when non-rebuild activity is current on an array. The speed is in Kibibytes per second (1 kibibyte = 210 bytes = 1024 bytes), and is a per-device rate, not a per-array rate . The default is 1000.
The /proc/sys/dev/raid/speed_limit_max is config file that reflects the current "goal" rebuild speed for times when no non-rebuild activity is current on an array. The default is 100,000.
To see current limits, enter:
sysctl dev.raid.speed_limit_min
sysctl dev.raid.speed_limit_max
NOTE: The following hacks are used for recovering Linux software raid, and to increase the speed of RAID rebuilds. Options are good for tweaking rebuilt process and may increase overall system load, high cpu and memory usage.
To increase speed you can increase these values. Here are the ones that work great on my machine:
echo 100000 > /proc/sys/dev/raid/speed_limit_min
echo 200000 > /proc/sys/dev/raid/speed_limit_max
These sets the min value to 10,000 K/sec and the max value to 20,000 K/sec. I have a quad core machine with 16 Gig of ram, and they seem to be about the best for me. Feel free to tinker with the values, and check which ones give you the best performance by running:
cat /proc/mdstat
Tip #2: Set read-ahead option
Set readahead (in 512-byte sectors) per raid device. The syntax is:
# blockdev --setra 65536 /dev/mdX
Where /dev/mdX is the device identifier for your Sofware RAID device. Below is an example of the command I run to set the read-ahead to 32 MIB:
blockdev --setra 65536 /dev/md127
Tip #3: Set stripe-cache_size for RAID5 or RAID 6
This is only available on RAID5 and RAID6 and boost sync performance by 3-6 times. It records the size (in pages per device) of the stripe cache which is used for synchronising all write operations to the array and all read operations if the array is degraded. The default is 256. Valid values are 17 to 32768. Increasing this number can increase performance in some situations, at some cost in system memory. Note, setting this value too high can result in an "out of memory" condition for the system. Use the following formula:
memory_consumed = system_page_size * nr_disks * stripe_cache_size
To set stripe_cache_size to 16 MiB for /dev/md127, type:
echo 16384 > /sys/block/md127/md/stripe_cache_size
To set stripe_cache_size to 32 MiB for /dev/md127, type:
echo 32768 > /sys/block/md127/md/stripe_cache_size
Tip #4: Disable NCQ on all disks
The following will disable NCQ on /dev/sda,/dev/sdb,..,/dev/sde using bash for loop
 for i in sd[abcde]
do
  echo 1 > /sys/block/$i/device/queue_depth
done
Tip #5: Bitmap Option
Bitmaps optimize rebuild time after a crash, or after removing and re-adding a device. Turn it on by typing the following command, making sure you change the device identifer to what ever your RAID is:
mdadm --grow --bitmap=internal /dev/md127
Once array rebuild or fully synced, disable bitmaps:
mdadm --grow --bitmap=none /dev/md127
After running those commands, my speeds increase dramatically. I went from 13184 K/sec to about 95108 K/sec! Hope that helps you save some time o your raid rebuilds.
Add disk back into a Linux MDADM software raid
I have a finicky disk on my home server that always drops from its RAID5 sofware raid. The good thing for me is this RAID is one I use for low importance, bulk data, like OS ISO's and other stuff I can easily re-download if needed. If you have a disk that keeps dropping from your RAID, I would recommend replacing the disk with one that is not so grumpy, and/or making sure you backups are in good shape.
However, I find that every now and then, usually after a reboot, this grumpy disk will eject itself from my RAID, so I have to re-insert it, and rebuild my array. Here is my "cookbook recipe" that I use to get it back. This post was mostly written for me, since I usually forget what commands I use, so I figured I would dump there for everyone else as well. Lest get started:
First, I need to find out which disk ejected, so run the mdadm command to get the details:
mdadm --detail /dev/md127
You might see something that looks like this:
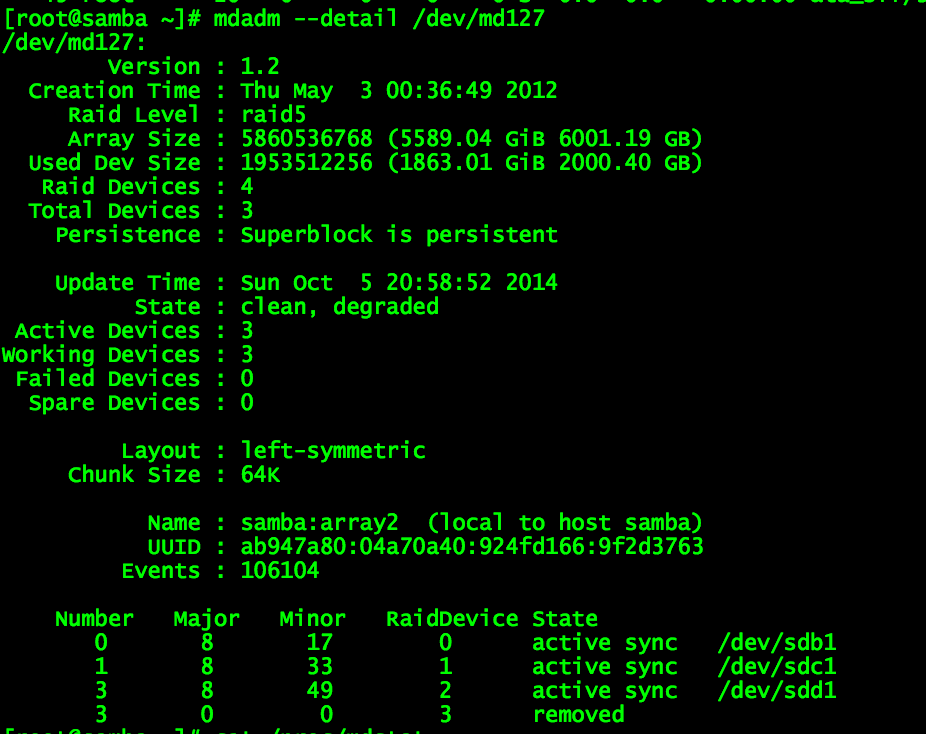
I then use fdisk to find the disk that went missing:
fdisk -cul
Now that I have found my disk, I can reinsert it into the array and let the rebuild begin:
mdadm --manage /dev/md127 --add /dev/sde1
The disk should be added back to the array, and should now be rebuilding. You can check the status of the rebuild a few different ways. The way I prefer is by watching /proc/mdstat. This command works great:
watch cat /proc/mdstat
You can also get the details by running:
mdadm --detail /dev/md127
There are a couple of ways you can speed up the rebuild process a few different ways. Be sure to check my post on speeding up the rebuild here: Helpful tips to speed up a linux software RAID rebuild